Category: Uncategorized

Maximize Your Energy Efficiency: How Homeowners Can Use the $1200 Federal Tax Credit to Reinsulate with Injection Foam by Adaptive Insulation

With energy prices on the rise and a growing focus on environmental sustainability, homeowners are increasingly looking for ways to reduce their energy consumption and lower their utility bills. One of the most effective ways to improve energy efficiency in your home is by upgrading its insulation. To encourage homeowners to invest in energy-efficient home improvements, the U.S. federal government has introduced a tax credit of up to $1200 that can be applied to insulation upgrades, including injection foam insulation.

If you’ve been considering reinsulating your home, now is the perfect time to do it—and Adaptive Insulation, a leader in energy-efficient home insulation solutions, can help you take full advantage of the federal tax credit with their cutting-edge injection foam insulation. In this blog, we'll discuss how the $1200 tax credit works, the benefits of using injection foam insulation, and how Adaptive Insulation can help you upgrade your home’s insulation to maximize your savings.

Understanding the $1200 Federal Tax Credit for Insulation

The federal government offers several incentives for homeowners to make energy-efficient upgrades, with insulation improvements being one of the most accessible options. The Residential Clean Energy Property Credit (sometimes referred to as the Energy Efficiency Home Improvement Credit) allows homeowners to claim a tax credit of up to $1200 for qualifying home energy upgrades, including insulation.

A tax credit is a direct reduction of the taxes you owe, making it more financially advantageous than a tax deduction, which simply reduces your taxable income. This means that when you take advantage of the $1200 federal tax credit, you can significantly offset the cost of your insulation project, making it an excellent financial decision.

What Types of Insulation Qualify?

To qualify for the federal tax credit, the insulation materials and installation must meet specific energy-efficiency standards. Fortunately, injection foam insulation, which is one of the most innovative and effective insulation solutions available today, qualifies under these guidelines when installed correctly by a professional company like Adaptive Insulation.

How to Claim the Credit

Claiming the $1200 tax credit is a simple process:

  1. Schedule an Assessment with Adaptive Insulation to determine the right insulation solution for your home.
  2. Ensure the insulation products used meet the federal energy-efficiency standards.
  3. Keep documentation of your purchase and installation costs, which you will need to submit when filing your federal tax return.
  4. Claim the tax credit on IRS Form 5695 for Residential Energy Credits when you file your taxes.

What Is Injection Foam Insulation?

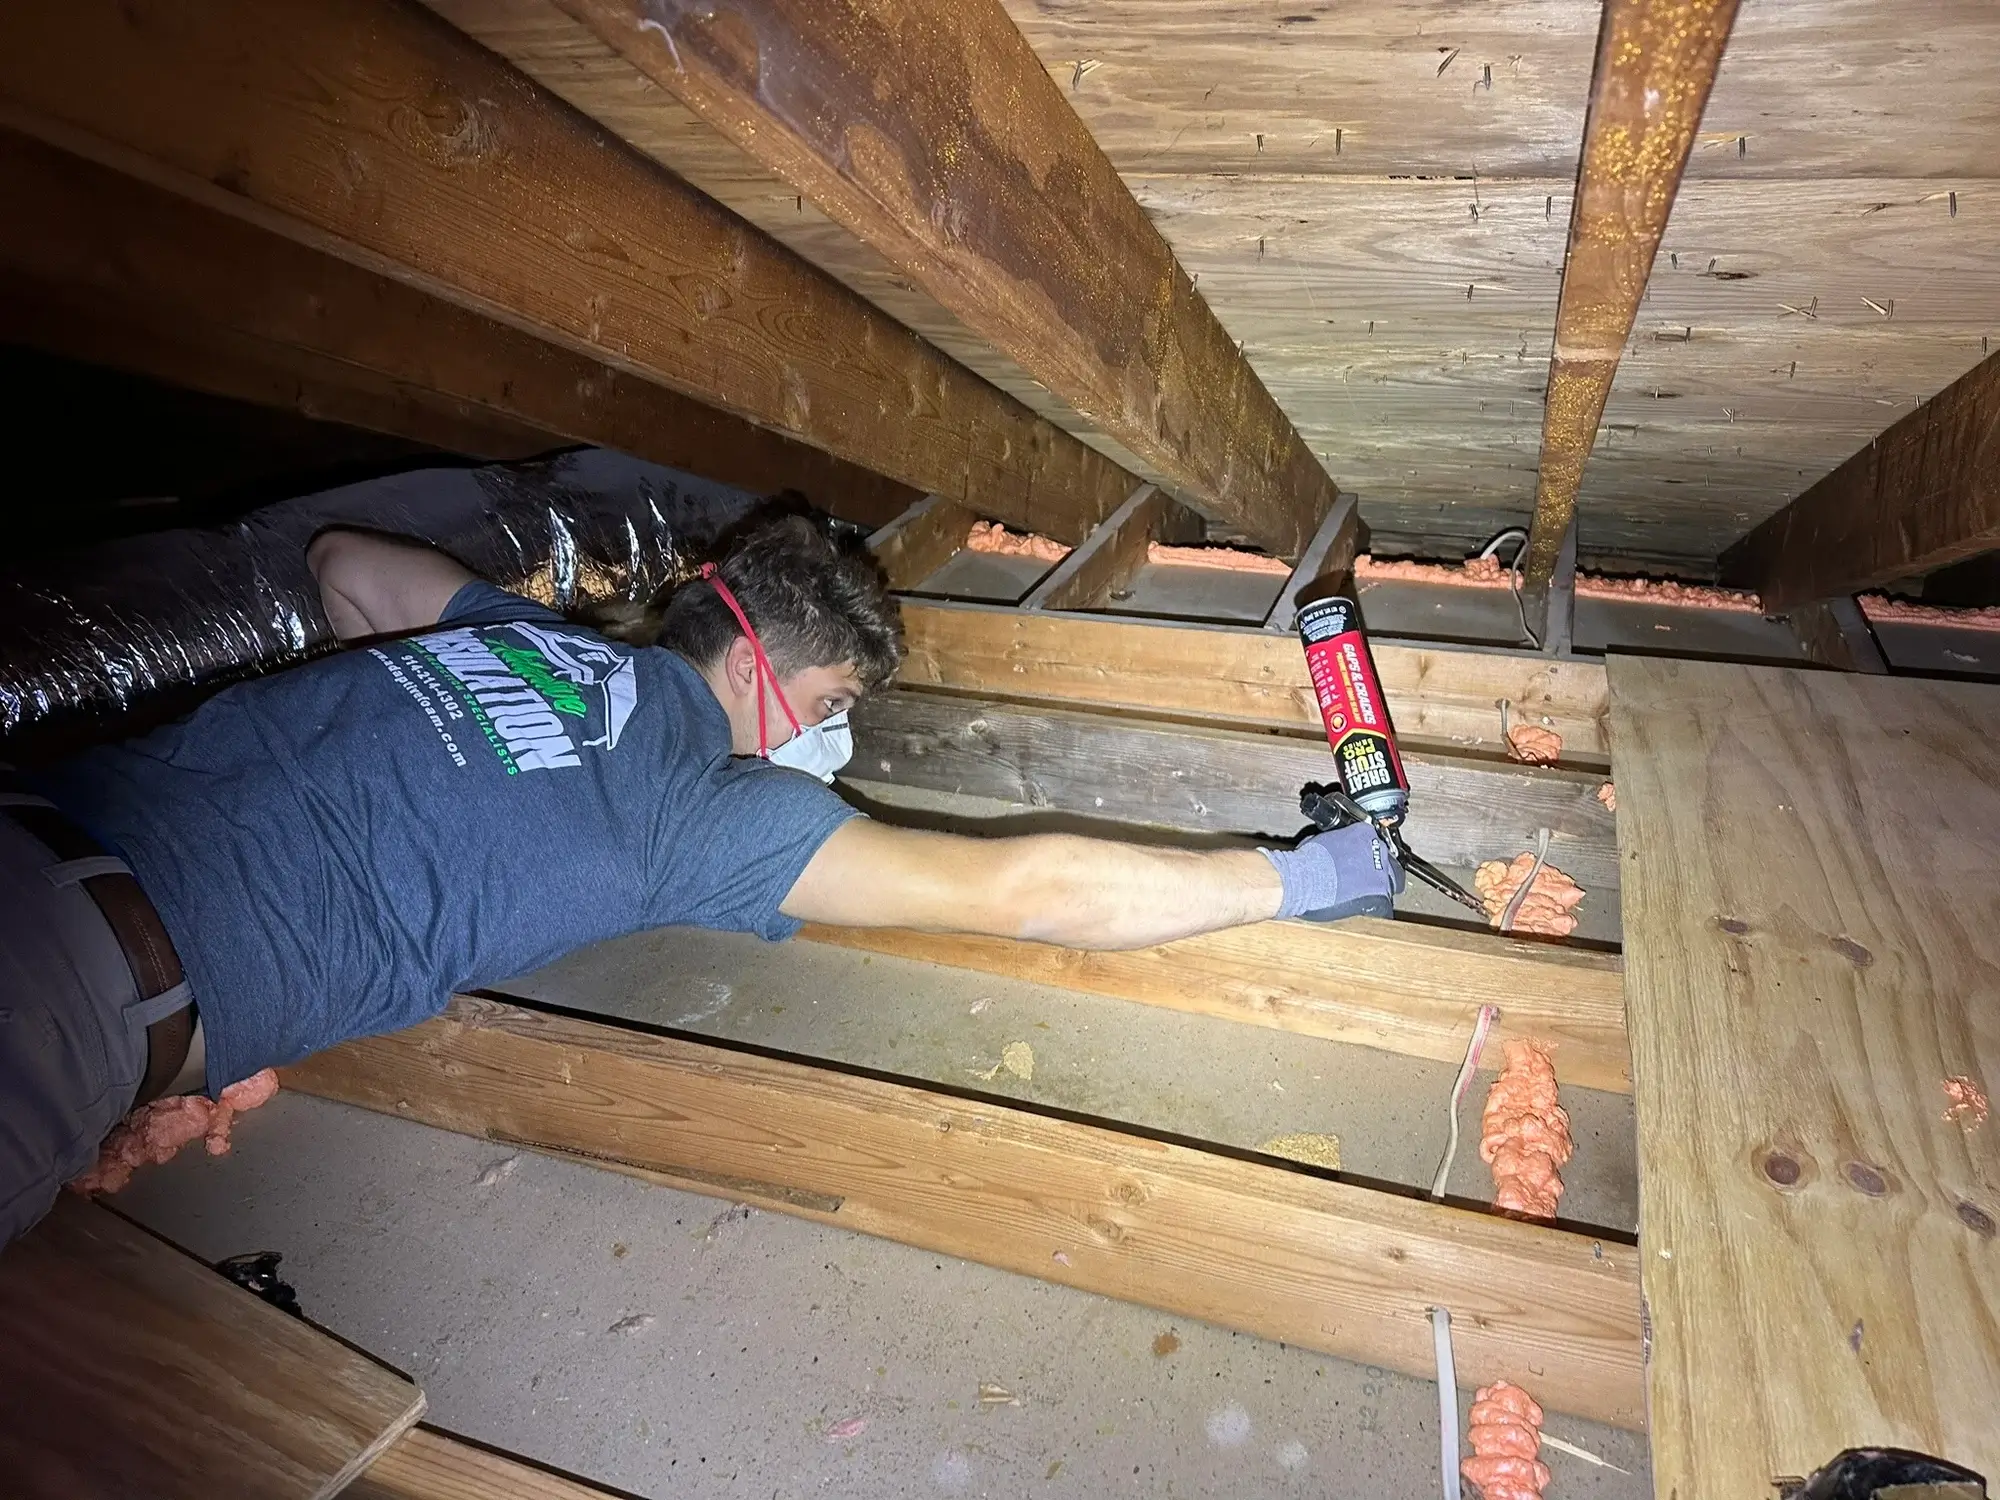
Injection foam insulation is a high-performance insulation solution designed to fill the gaps and cavities within your home’s walls, ensuring a complete thermal barrier. Unlike traditional insulation materials like fiberglass batts or blown-in cellulose, injection foam is injected into wall cavities and hard-to-reach areas, expanding to fill every nook and cranny. This seamless application ensures maximum insulation coverage, helping to significantly improve your home’s energy efficiency.

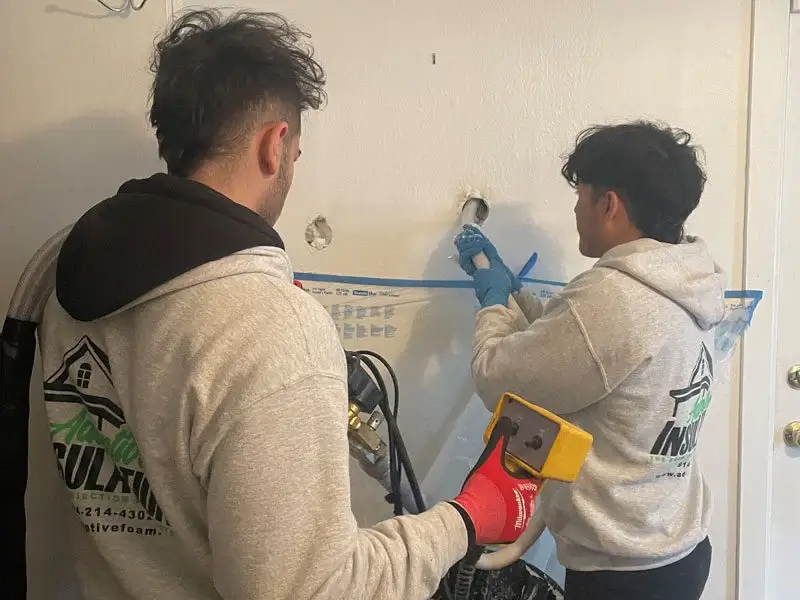
Injection foam insulation is especially beneficial for existing homes, as it can be applied without major structural changes. The foam is injected into the walls through small holes that are then patched up, making it a minimally invasive yet highly effective option for reinsulating your home.

Why Choose Injection Foam?

Here are some key reasons why homeowners choose injection foam insulation for their homes:

  1. Superior Thermal Performance: Injection foam creates an airtight seal, preventing the transfer of heat between the inside and outside of your home. This means your home will stay cooler in the summer and warmer in the winter, reducing the workload on your HVAC system and lowering energy costs.
  2. Air and Moisture Barrier: Unlike traditional insulation, injection foam acts as both an insulator and a barrier to air and moisture, preventing drafts and condensation buildup. This leads to a more comfortable living environment and helps prevent moisture-related issues like mold growth.
  3. Soundproofing Benefits: In addition to its thermal properties, injection foam also offers soundproofing benefits, helping to reduce the transmission of noise between rooms and from the outside. This makes it ideal for homeowners looking to create a quieter, more peaceful living environment.
  4. Long-Term Durability: Injection foam does not degrade, sag, or settle over time, unlike other insulation types. Once installed, it provides long-lasting protection, helping you maintain energy efficiency for years to come.
  5. Environmentally Friendly: Injection foam is an eco-friendly insulation option. It helps reduce your home’s energy consumption, lowering your carbon footprint. Plus, because it’s made from sustainable materials, injection foam insulation is a green choice for environmentally conscious homeowners.

How Injection Foam Insulation Can Save You Money

Insulating your home with injection foam can lead to substantial long-term savings. Here are some ways in which you can save money by upgrading your insulation:

  1. Reduced Energy Bills
    One of the most immediate benefits of injection foam insulation is a significant reduction in your energy bills. Since injection foam creates an airtight seal, your heating and cooling systems won’t need to work as hard to maintain a comfortable indoor temperature. This leads to reduced energy consumption, with some homeowners seeing as much as 20-50% savings on their heating and cooling costs.
  2. Lower HVAC Maintenance Costs
    By making your home more energy-efficient with injection foam insulation, you’ll also reduce the strain on your HVAC system. This can lead to fewer breakdowns and a longer lifespan for your heating and cooling equipment, saving you money on repairs and replacements in the long run.
  3. Increased Home Value
    Energy-efficient upgrades like injection foam insulation can also increase your home’s market value. Potential buyers are often willing to pay more for homes with energy-saving features, recognizing the long-term cost benefits. With injection foam insulation from Adaptive Insulation, you’ll not only reduce your energy bills but also enhance the overall value of your property.
  4. Federal Tax Credit
    As mentioned earlier, the $1200 federal tax credit is a powerful incentive to reinsulate your home. By choosing injection foam insulation, you can qualify for this credit and lower the upfront cost of your insulation project. Combined with the energy savings you’ll enjoy over time, this makes upgrading your home’s insulation an excellent financial decision.

Why Adaptive Insulation Is the Best Choice for Injection Foam Insulation

When it comes to reinsulating your home, not all insulation companies are created equal. Choosing the right provider is crucial to ensuring that your insulation project meets the necessary standards for the federal tax credit and delivers the maximum energy savings. Here’s why Adaptive Insulation is the best choice for injection foam insulation:

  1. Expertise in Energy Efficiency
    Adaptive Insulation is a trusted leader in home energy efficiency. Their team of insulation experts is highly knowledgeable about the latest insulation products and installation techniques, ensuring that your home receives the most effective insulation solution. Whether you’re dealing with high energy bills, drafty rooms, or uneven temperatures, Adaptive Insulation can tailor their services to meet your specific needs.
  2. High-Quality, Tax-Credit-Eligible Products
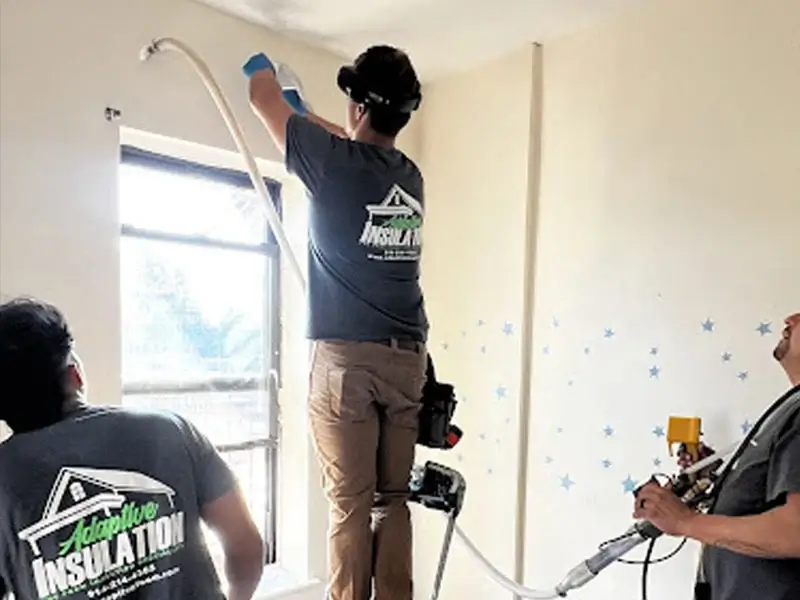
    The injection foam insulation used by Adaptive Insulation meets or exceeds the federal energy-efficiency standards required for the $1200 tax credit. This means you can be confident that your insulation project will qualify for the credit, maximizing your savings. Plus, their foam insulation products are designed to provide superior long-term performance, ensuring that your home remains energy-efficient for years to come.
  3. Professional Installation
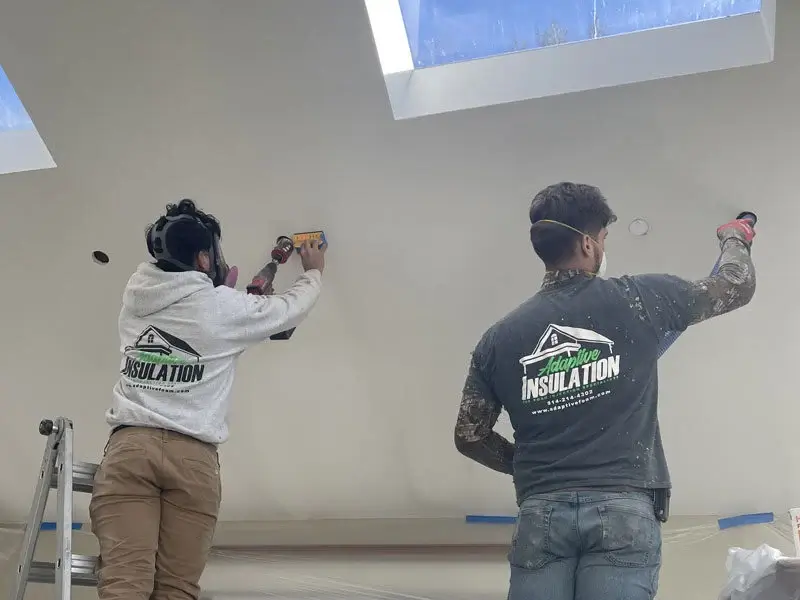
    Proper installation is key to ensuring that your insulation performs as expected. Adaptive Insulation’s team of highly trained professionals follows best practices for installing injection foam insulation, ensuring that every cavity is filled and every area of your home is properly sealed. Their attention to detail ensures that your home will be more comfortable and energy-efficient after the insulation upgrade.
  4. Customer-Centric Approach
    Adaptive Insulation prides itself on delivering exceptional customer service. From the initial consultation to the final installation, their team will guide you through every step of the process. They’ll answer all of your questions, provide expert recommendations, and ensure that the project is completed to your satisfaction.

How to Get Started with Adaptive Insulation

If you’re ready to take advantage of the $1200 federal tax credit and reinsulate your home with injection foam, the process is simple:

  1. Contact Adaptive Insulation: Reach out to their team to schedule a consultation. They’ll assess your home’s insulation needs and recommend the best solution.
  2. Get a Custom Insulation Plan: Based on their assessment, Adaptive Insulation will create a custom insulation plan tailored to your home’s unique layout and energy efficiency goals.
  3. Schedule the Installation: Once you’ve approved the plan, their team will handle the installation of your new injection foam insulation quickly and efficiently.
  4. Claim the Tax Credit: After the installation is complete, save your receipts and necessary documentation to claim the federal tax credit on your next tax return.

Reinsulating your home with injection foam insulation is one of the smartest investments you can make in terms of energy savings, comfort, and environmental impact. By taking advantage of the $1200 federal tax credit, you can significantly reduce the cost of your insulation upgrade while enjoying long-term benefits. Partnering with Adaptive Insulation ensures that you receive high-quality, tax-credit-eligible products and professional installation that will maximize your energy savings and comfort for years to come.

Don’t wait to make your home more energy-efficient—contact Adaptive Insulation today and start saving!

The Importance of Air Sealing Before Insulation: A Focus on Attics and Adaptive Insulation

When homeowners consider improving their energy efficiency, insulation is often the first thing that comes to mind. While insulation plays a vital role in maintaining comfortable indoor temperatures and reducing energy costs, there’s an equally critical step that must not be overlooked: air sealing. This blog will delve into the importance of air sealing, particularly in attics, and how companies like Adaptive Insulation can help ensure that your home is both energy-efficient and comfortable.

Understanding the Basics: Air Sealing vs. Insulation

Before we explore the significance of air sealing, it's essential to understand the difference between air sealing and insulation.

Here at Adaptive Insulation we say: “It is malpractice to insulate without air sealing”.

Air Sealing: This process involves identifying and sealing gaps and cracks in your home's envelope where air can escape or enter. Common sources of leaks include around windows, doors, and various penetrations through walls and ceilings.

Insulation: This material slows down heat transfer and is typically installed in walls, floors, and attics. Insulation comes in various forms, including fiberglass batts, spray foam, and cellulose.

While insulation is crucial for regulating temperature, it cannot function effectively if there are significant air leaks present. In fact, adding insulation without first addressing air sealing can lead to wasted energy and diminished comfort.

The Importance of Air Sealing Before Insulation

Enhanced Insulation Performance

One of the primary reasons for air sealing before insulation is to ensure that the insulation performs as intended. When air leaks are present, conditioned air can escape and unconditioned air can enter, significantly reducing the effectiveness of your insulation. For example, if you have fiberglass insulation in your attic, any air movement can bypass it, making it less effective at maintaining a stable indoor temperature.Energy Efficiency and Cost Savings

Air sealing is an investment that can yield substantial savings on your energy bills. Studies have shown that homeowners can save anywhere from 10% to 20% on heating and cooling costs by properly sealing air leaks. This is particularly relevant for attics, which can be significant sources of energy loss. When you reduce air leaks, your heating and cooling systems can operate more efficiently, leading to lower energy costs over time.Improved Indoor Comfort

A well-sealed attic contributes to a more comfortable living environment. Without air leaks, you’re less likely to experience drafts or uneven temperatures throughout your home. This is particularly beneficial during extreme weather conditions, as you’ll maintain a more stable indoor climate.Prevention of Moisture Issues

Air leaks can introduce moisture-laden air into your attic, leading to condensation and the potential for mold growth. Mold not only poses health risks but can also cause damage to your home’s structure and insulation. By effectively sealing air leaks, you reduce the chances of moisture intrusion, protecting your home and its inhabitants.Enhanced Indoor Air Quality

Air leaks can allow allergens, dust, and pollutants from outside to enter your home, impacting your indoor air quality. Sealing these leaks can improve the overall air quality, making your home a healthier place for you and your family.Protection Against Pests

Unsealed air leaks can also serve as entry points for pests, such as rodents and insects. By addressing these gaps, you can reduce the risk of infestations, protecting your attic and the rest of your home from potential damage.

Common Sources of Air Leaks in Attics

Understanding where air leaks commonly occur is crucial for effective air sealing. In attics, the following areas are often culprits:

Ductwork: HVAC ducts that run through the attic can be significant sources of air leaks, particularly at joints and seams. Properly sealing these connections is essential.

Penetrations: Electrical wires, plumbing pipes, and vents that penetrate through ceilings and walls can create gaps that lead to air leakage.

Attic Hatches and Access Doors: These points are often overlooked but can be responsible for significant airflow if not sealed properly.

Ridge Vents and Gable Vents: While these ventilation methods are necessary for attic airflow, they can sometimes contribute to unwanted air exchange if not properly managed.

Knee Walls: In homes with sloped roofs, knee walls can create junctions where air leakage is common.

The Role of Adaptive Insulation

Adaptive Insulation is committed to helping homeowners improve their energy efficiency through innovative solutions. By focusing on both air sealing and insulation, they provide a comprehensive approach to home energy performance. Here’s how Adaptive Insulation stands out in the realm of air sealing and insulation:

Comprehensive Assessments

Adaptive Insulation begins with a thorough assessment of your home. This evaluation includes identifying potential air leaks and determining the best insulation strategy. By understanding the specific needs of your attic, they can create a tailored plan that maximizes energy efficiency.

Expert Air Sealing Services

With a team of experienced professionals, Adaptive Insulation excels in air sealing. They utilize advanced techniques and high-quality materials to ensure that your home is properly sealed before any insulation is added. This focus on air sealing enhances the effectiveness of the insulation and promotes long-term energy savings.

Quality Insulation Products

Adaptive Insulation offers a range of insulation products, ensuring that you have access to the best materials for your home. Whether you choose fiberglass, cellulose, or spray foam, their team can guide you through the selection process and ensure proper installation.

Education and Support

One of the key benefits of working with Adaptive Insulation is their commitment to educating homeowners about the importance of air sealing and insulation. They provide valuable resources and information, empowering you to make informed decisions about your home’s energy efficiency.

Steps to Effective Air Sealing in Your Attic

If you’re considering air sealing your attic, here are some essential steps to follow. While some homeowners may choose to tackle this as a DIY project, it’s often beneficial to consult with professionals like Adaptive Insulation for the best results.

Step 1: Conduct an Air Leak Assessment

Begin by identifying potential sources of air leaks in your attic. Common methods include:

Visual Inspection: Look for gaps and cracks around ductwork, plumbing, and electrical penetrations.

Smoke Pencil Test: Use a smoke pencil or incense stick to detect airflow around potential leak areas.

Blower Door Test: For a more comprehensive assessment, consider hiring professionals to perform a blower door test. This process identifies leaks more accurately and provides a clearer picture of your home’s air sealing needs.

Step 2: Gather Materials

Collect the necessary materials for air sealing, including:

- Caulk (for small gaps)

- Expanding foam (for larger gaps)

- Weatherstripping (for attic hatches and doors)

- Insulation baffles (to maintain airflow around vents)

- Safety gear (gloves, mask, goggles)

Step 3: Seal Small Gaps

Use caulk for small cracks and gaps around electrical boxes and plumbing penetrations. For larger voids, expanding foam is ideal for filling gaps effectively.

Step 4: Insulate Ductwork

If you have HVAC ducts in your attic, ensure they are properly insulated and sealed. Use duct mastic or foil tape to seal any joints and seams, and consider wrapping ducts with insulation to minimize energy loss.

Step 5: Address Access Points

Ensure your attic hatch or access door is well-sealed. Apply weatherstripping around the edges and consider using an insulated cover for added protection against air leakage.

Step 6: Install Insulation Baffles

If you plan to add insulation, consider installing baffles to maintain airflow around soffit vents. This helps prevent insulation from blocking ventilation and ensures your attic remains well-ventilated.

Step 7: Recheck for Leaks

Once you’ve completed the air sealing process, conduct another inspection to ensure that all potential leaks have been addressed. This step is crucial for achieving optimal energy efficiency.

Step 8: Add Insulation

Now that your attic is sealed, it’s time to add insulation. Choose the right type of insulation for your needs, whether it’s fiberglass, cellulose, or spray foam. Follow manufacturer guidelines for installation to ensure optimal performance.

Conclusion

Air sealing is an essential step that should never be overlooked when insulating your attic. By properly addressing air leaks, you can enhance the performance of your insulation, improve energy efficiency, and create a more comfortable living environment. Companies like Adaptive Insulation play a pivotal role in guiding homeowners through this process, ensuring that both air sealing and insulation are done effectively.As you embark on your journey to improve your home’s energy efficiency, remember that investing in air sealing before insulation is not just a smart choice—it’s a necessary one. The benefits of a well-sealed attic extend beyond energy savings; they contribute to a healthier, more comfortable home. So, take the time to assess your attic, seal those leaks, and reap the rewards of a more efficient and enjoyable living space.

Injection Foam vs. Spray Foam: What’s the Difference?

When it comes to insulating your home or commercial property, selecting the right insulation material can make all the difference. At Adaptive Insulation, based in Mahopac, New York, we’re here to help you navigate the options and make an informed choice. Two of the most popular insulation methods today are injection foam and spray foam. While both provide energy efficiency and improved comfort, they differ significantly in application, performance, and ideal use cases.

This blog explores the key differences between injection foam and spray foam, helping you determine which is the right choice for your project.

Understanding Injection Foam

Injection foam insulation is specifically designed for existing structures. It’s a resin-based material that, when mixed with a foaming agent, expands to fill gaps and cavities within walls. Injection foam is often applied through small holes drilled into walls, making it an excellent solution for retrofitting insulation without extensive demolition.

Key Characteristics of Injection Foam:

  • Material Composition: Typically made from a blend of polymers and foaming agents.
  • Applications: Best for retrofitting older homes, insulating closed wall cavities, and filling spaces that traditional insulation might miss.
  • Thermal Resistance (R-Value): Usually ranges between R-4 and R-5 per inch.
  • Moisture Resistance: Many injection foam products resist mold and mildew, making them suitable for damp environments.
  • Rodent Resistance: Many injection foam products also contain rodent and insect repellents

Injection foam expands moderately, ensuring it doesn’t exert excess pressure on wall structures. This makes it ideal for insulating hollow walls without damaging the existing framework.

Understanding Spray Foam

Spray foam insulation is a polyurethane-based material that starts as a liquid and rapidly expands upon application. It’s a versatile insulation option that comes in two types: open-cell and closed-cell.

Key Characteristics of Spray Foam:

  • Material Composition: A combination of isocyanate and polyol resin.
  • Applications: Commonly used for attics, crawl spaces, ceilings, and open wall cavities
  • Thermal Resistance (R-Value): Open-cell spray foam has an R-value of about R-3.5 to R-4 per inch, while closed-cell spray foam boasts an impressive R-value of R-6 to R-7 per inch.
  • Air and Moisture Barrier: Spray foam creates an airtight seal and resists moisture effectively, particularly in the closed-cell variant.

Spray foam’s ability to expand significantly upon application makes it an excellent choice for sealing cracks, gaps, and even irregularly shaped spaces.

Installation Process Comparison

Injection Foam Installation:

  1. Small holes are drilled into the walls, typically in the siding or interior drywall.
  2. The foam is injected into the wall cavities, where it expands to fill the space.
  3. The holes are sealed after installation, leaving minimal visible evidence of the process.

This minimally invasive method makes injection foam perfect for existing homes where extensive renovations are not an option.

Spray Foam Installation:

  1. Spray foam is applied directly onto surfaces, such as walls, ceilings, or attic floors, using a specialized sprayer.
  2. The foam expands on contact, filling gaps and creating a continuous barrier.
  3. Once cured, the foam hardens into a solid, durable material.

Spray foam is ideal for open spaces and new construction projects, where direct application is possible. 

Performance Differences

Thermal Performance:

  • Injection Foam: Provides consistent thermal resistance with an R-value of around R-4 to R-5 per inch. While not as high as closed-cell spray foam, it is sufficient for many retrofitting needs.
  • Spray Foam: Closed-cell spray foam offers an industry-leading R-value of R-6 to R-7 per inch, making it the top choice for maximum energy efficiency.

Air Sealing:

  • Injection Foam: Reduces drafts and improves energy efficiency but does not create a completely airtight seal (comparable to a wall cavity dense packed with cellulose)
  • Spray Foam: Forms an airtight barrier, preventing air leaks and reducing heating and cooling costs.

Moisture Resistance:

  • Injection Foam: Resistant to mold and mildew but does not act as a vapor barrier.
  • Spray Foam: Closed-cell spray foam is highly moisture-resistant and can function as a vapor barrier, making it suitable for areas prone to high humidity.

Cost Considerations

Injection Foam Costs:

Injection foam is generally more affordable than spray foam, especially for retrofitting existing walls. The installation process is less labor-intensive, and the material costs are lower.

Spray Foam Costs:

Spray foam, particularly the closed-cell variety, is more expensive due higher material costs. 

Environmental Impact

Injection Foam:

Many injection foam products are environmentally friendly, with minimal off-gassing and a lower carbon footprint. The installation process is also less wasteful, as it’s designed for existing structures.

Spray Foam:

While highly effective, spray foam can have a higher environmental impact due to the chemicals used in its production. However, advancements in manufacturing have led to greener formulations that reduce environmental concerns.

Pros and Cons

Injection Foam Pros:

  • Minimal disruption during installation
  • Cost-effective for retrofitting
  • Effective thermal resistance
  • Eco-friendly options available

Injection Foam Cons:

  • Lower R-value compared to closed-cell spray foam
  • Less effective at sealing air leaks

Spray Foam Pros:

  • Superior R-value, especially for closed-cell spray foam
  • Airtight and moisture-resistant
  • Versatile for new construction and open spaces
  • Long-lasting and durable

Spray Foam Cons:

  • Higher upfront cost
  • May involve more environmental concerns

Choosing the Right Insulation for Your Project

Deciding between injection foam and spray foam comes down to your specific needs, budget, and the nature of your project. Here are a few questions to help guide your choice:

  1. Is your property new or existing?
    • For existing homes or retrofitting, injection foam is often the best choice.
    • For new construction or open spaces, spray foam offers superior performance.
  2. What is your budget?
    • If cost is a major factor, injection foam is more budget-friendly.
  3. Do you need an airtight seal?
    • For complete air sealing, spray foam is unmatched.
    • Injection foam reduces drafts but doesn’t create an airtight barrier.

Conclusion

Both injection foam and spray foam insulation offer unique benefits, and the choice between them largely depends on your project’s requirements. Injection foam is perfect for retrofitting older homes with minimal disruption, while spray foam excels in providing superior insulation and air sealing for new construction and open spaces.

At Adaptive Insulation in Mahopac, New York, we specialize in helping homeowners and businesses make the best insulation decisions. Our team of experts can assess your property, discuss your goals, and recommend the ideal solution. Contact us today to schedule a consultation and take the first step toward a more energy-efficient and comfortable space!

How Adaptive Insulation Performs an Injection Foam Job: A Step-by-Step Process

When it comes to improving home comfort and energy efficiency, few upgrades rival the benefits of injection foam insulation. At Adaptive Insulation, we take pride in our meticulous process, ensuring our customers enjoy enhanced comfort, reduced energy bills, and a quieter home. In this blog, we'll walk through every step of our injection foam insulation process, from the initial preparation to the final touches. Along the way, we'll share a customer testimonial that illustrates the care and dedication we bring to every project.

Prepping the Site: Setting the Stage for Excellence

Every successful insulation job begins with thorough preparation. At Adaptive Insulation, we understand that your home is your sanctuary, so we take extra steps to protect it. Before starting any work, our team assesses the site and prepares the area. This includes laying protective tarps, ensuring all necessary tools are in place, and taking stock of any special considerations, such as landscaping or outdoor features.

As one customer, Jane, noted in her testimonial, “I was very amazed by the team's attention to detail and respect for my property.” Our preparation process reflects our commitment to delivering high-quality service with minimal disruption to your home.

Removing Siding: Accessing the Stud Cavities

Once the site is prepped, the next step is to carefully remove the siding. This step is crucial for accessing the stud cavities in your exterior walls. Our team works methodically to ensure the siding is removed without damage. Any shutters or exterior accessories are also taken down at this stage.

Jane shared an experience that highlights our care during this process: “On removal of my shutters during the first installation visit, they discovered that the screws weren't able to be reinstalled. They went ahead and ordered the proper screws and amount and installed them on all my shutters after finishing the second installation job.”

This kind of attention to detail exemplifies our commitment to going above and beyond for our customers, ensuring that your home looks as good as—or better than—before we started.

Drilling Stud Cavities: Precision Matters

With the siding removed, we drill small, precise holes into every stud cavity. These holes serve as access points for the injection foam. Drilling is a critical step, as it ensures that the foam reaches every nook and cranny of the wall, creating a complete thermal barrier.

Our team carefully measures and spaces these holes to avoid unnecessary damage and ensure optimal foam coverage. This level of precision guarantees that the insulation performs as intended, providing maximum energy efficiency and comfort.

Injecting the Foam: The Heart of the Process

Now comes the most exciting part: injecting the foam. Using specialized equipment, we pump high-quality spray foam into the wall cavities. The foam expands and hardens, filling every gap, crack, and void in the wall. This not only improves thermal insulation but also creates a soundproof and pest-resistant barrier.

As Jane observed, “By the way, if you have mice inside your walls, the injection foam insulation will resolve that issue. Also, it adds some soundproofing so that neighborhood gardening sounds are more muffled.”

The benefits of spray foam insulation go far beyond temperature control, making it a versatile solution for homeowners looking to improve their living spaces.

Plugging the Holes: Seamless Restoration

After the foam has been injected and fully cured, we plug the holes. This step is performed with great care to ensure that the wall is restored to its original state. We use materials that match the existing wall structure to make the repairs as seamless as possible.

Reinstalling Siding: The Finishing Touches

Once the holes are plugged, we reinstall the siding, shutters, and any other exterior features. Our goal is to leave your home looking untouched, as if we were never there. Jane noted, “My vinyl siding also looks untouched. I look forward to my future energy savings!”

Reinstalling the siding is not just about aesthetics; it's about ensuring the durability and integrity of your home's exterior. Our team meticulously checks every detail to guarantee a flawless finish.

Breaking Down the Prep Work: Leaving No Trace

The final step in our process is breaking down the prep work and cleaning up the site. We remove tarps, pack up tools, and ensure that your property is spotless before we leave. This commitment to cleanliness reflects our respect for your home and our dedication to professional service.

As Jane shared, “The second injection foam job took especially long from morning to night. Although it was a long day, it didn’t stop Dan and Josh from properly reinstalling my shutters.”

The Adaptive Insulation Difference

What sets Adaptive Insulation apart is not just our technical expertise but also our unwavering commitment to customer satisfaction. From the initial consultation to the final cleanup, we go the extra mile to ensure every project exceeds expectations.

Jane's experience underscores this dedication: “I first learned of Adaptive Insulation when Dan and Josh canvassed my neighborhood about 2 months ago. I had never considered the quality of insulation within the outside walls around my house and how that could affect home comfort and savings on my energy bills.”

She continued, “Since having Dan and his team come, my dad’s space keeps the temperature much better. We’ve already had several cold nights and mornings, but there’s not much need to keep his heat on as long. I was so impressed that I called Dan back to complete the rest of my house.”

Conclusion: A Comfortable, Energy-Efficient Home Awaits

At Adaptive Insulation, we believe that every home deserves to be comfortable, efficient, and quiet. Our injection foam process is designed to deliver these benefits while treating your home with the utmost care. From preparation to cleanup, every step is performed with precision and professionalism.

If you’re ready to enhance your home’s comfort and energy efficiency, contact Adaptive Insulation today. Let us show you why our customers, like Jane, continue to trust us with their insulation needs.

Unlock Big Savings with ConEd Weatherization Rebates: A Guide by Adaptive Insulation

If you’re a homeowner or business owner in ConEdison’s service territory, the ConEd Weatherization Rebates program can help you improve your property’s energy efficiency while saving money. At Adaptive Insulation, we’re committed to helping you maximize the benefits of these rebates. This comprehensive guide will explain everything you need to know about eligibility, rebate amounts, and how to claim your rebate.

What is the ConEd Weatherization Rebate Program?

The ConEdison Weatherization Rebate program is part of ConEd's energy efficiency initiatives, aimed at reducing energy consumption, lowering utility bills, and improving environmental sustainability. Through this program, ConEd provides financial incentives for homeowners and businesses to install energy-efficient upgrades, such as better insulation, air sealing, and high-performance windows.

Who is Eligible for the ConEd Weatherization Rebates?

To qualify for ConEd’s Weatherization Rebates, you must meet the following criteria:

  1. Residency in ConEdison’s Service Area:
    • You must be a ConEd electricity or natural gas customer. This includes residential, commercial, and multifamily property owners.
  2. Energy Efficiency Project Scope:
    • Your project must involve eligible upgrades, such as insulation, air sealing, or energy-efficient windows/doors.
  3. Income Qualification for Enhanced Rebates:
    • There are additional incentives for income-eligible customers. If your household income falls below a certain threshold, you could qualify for enhanced rebates. This is part of ConEd's effort to assist low- to moderate-income households in making energy-efficient improvements.
  4. Professional Installation Requirements:
    • Rebates are typically awarded for work completed by licensed professionals. Adaptive Insulation can help ensure your project is compliant with ConEd’s standards.

How Much Can You Save?

The rebate amount depends on the scope of your project and your eligibility. Below is a breakdown of the typical rebate amounts:

  1. Insulation Rebates:
    • Residential customers can receive up to $3,000 for improving insulation in attics, walls, or floors.
    • Commercial customers may qualify for larger rebates, based on square footage and energy savings projections.
  2. Air Sealing:
    • Rebates cover up to $1,000 for comprehensive air sealing, which reduces drafts and prevents energy loss.

Steps to Claim Your ConEd Weatherization Rebates

Here’s a step-by-step guide to help you access these savings:

1. Assess Your Energy Efficiency Needs

  • Schedule a professional energy audit. Adaptive Insulation can assist in evaluating your property’s energy efficiency and recommend upgrades that qualify for rebates.

2. Verify Your Eligibility

  • Check whether your property and planned upgrades meet ConEd’s requirements.
  • Determine if you qualify for enhanced rebates based on income. Documentation such as tax returns or pay stubs may be required.

3. Choose a Licensed Contractor

4. Complete the Application Process

  • Pre-Approval (for larger projects): Some projects require prior approval from ConEd before work begins.
  • Submit the application form along with necessary documentation, such as:
    • Proof of property ownership or occupancy.
    • Contractor estimates or invoices.
    • Energy audit results.

5. Perform the Upgrades

  • Once approved, hire a licensed contractor to complete the work. Adaptive Insulation ensures timely and compliant installation of all upgrades.

6. Submit Final Documentation

  • After the project is complete, submit all final paperwork, including:
    • Receipts or invoices for materials and labor.
    • Before-and-after photos of the work (if applicable).

7. Receive Your Rebate

  • Rebates are typically processed within 4–6 weeks after ConEd reviews your application and confirms compliance.

Why Choose Adaptive Insulation for Your Weatherization Project?

At Adaptive Insulation, we specialize in energy efficiency upgrades that align with ConEd’s rebate program. Here’s why customers trust us:

  1. Expert Guidance:
    • We help navigate the complexities of the rebate process, ensuring you don’t miss out on savings.
  2. Licensed Professionals:
    • Our team meets all the licensing and certification requirements to qualify for ConEd rebates.
  3. Customized Solutions:
    • Every property is unique, and we tailor our weatherization solutions to maximize energy savings and comfort.
  4. Hassle-Free Process:
    • From the initial audit to final rebate submission, we handle every detail.

Frequently Asked Questions

Q: Can I combine ConEd rebates with other programs?

Yes! You can often combine ConEd rebates with state or federal tax credits, such as the Inflation Reduction Act’s energy efficiency incentives. This can further reduce your costs.

Q: What if I’ve already completed upgrades?

Rebates typically apply only to new projects. However, if your upgrades were done recently, you may still be eligible if all documentation is in order. Contact ConEd or Adaptive Insulation for clarification.

Q: How much time do I have to apply for the rebate?

Applications must be submitted within 90 days of project completion. Some programs may have additional deadlines or budget limits, so it’s best to act quickly.

Q: Can renters apply for rebates?

Renters can collaborate with property owners to implement eligible upgrades. Landlords may be eligible to claim the rebate.

Take the Next Step Toward Energy Savings

ConEd’s Weatherization Rebates are a fantastic opportunity to save money, improve your property’s energy efficiency, and reduce your environmental impact. At Adaptive Insulation, we’re here to guide you through the process from start to finish.

Ready to get started? Contact Adaptive Insulation today for a free consultation and energy audit. Together, we’ll ensure you unlock every available rebate while enhancing the comfort and efficiency of your property.

Don’t wait—rebate funds are limited! Let Adaptive Insulation help you make the most of ConEd’s Weatherization Rebates today. Get Started Now!